If you’re the type of athlete that uses shoes for your sport—like tennis, running, hiking, or walking—you’re bound to end up with blisters. New shoes or too tight or loose shoes are often culprits, but there are a variety of factors that play into whether or not you’re more-or less likely to end up hobbling through your event with blisters or curtailing your workout.
I wasn’t a shoe-wearing athlete, but I had plenty of blisters on my hands from heat and shear forces generated from swinging bars day after day after day. Yes, our hands got hot just like a runner’s feet. I had to learn how to take care of them, and managing them meant attending to my hands on a daily basis.
When I became an athletic trainer, I cared for other people’s feet (and hands) and their blisters. Humbling thing, taking care of other people’s feet. And having someone take care of yours. Feet aren’t always the prettiest body parts, but they tend to bear the brunt of athletic activity.
How to Treat a Blister
Look online or in a book for guidelines on blister care, and you’re liable to find a host of suggestions. While the materials available to pad and treat blisters has changed somewhat and improved a little, the goals for blister treatment are still the same.
Goals—
- Decide whether or not the blister is causing pain and needs to be broken or just padded with protective padding.
- Always work with the goal in mind to NOT make the blister bigger, worse or allow infection to infiltrate it.
- Treat it in a way that promotes the fastest healing.
- Figure out what caused the blister in the first place and work to avoid further irritation or future blistering.
Immediate care for the basic blister—
There was a general routine we followed when taking care of foot blisters, which often occurred on the back of the heal.
- We would assess whether or not we could let the fluid stay in the blister and simply use padding material and tape to create a donut hole around the blister and tape the donut hole (usually of moleskin with sticky backing or a thicker material that was built up just a little higher than the blister).
The problem with this procedure is that if you make the donut hole too large, larger then the blister, you will usually end up with a larger blister! So beware when trying this method.
If the blister was simply too large or too painful for basic padding, then we’d do the following—
- Using an alcohol wipe or betadine pad, we’d wipe the blister and surrounding area in order to disinfect it.
- Then, using a small scalpel or curved scissors, we made a tiny slice (about the size of a cotton swab) along one edge of the blister, as close to the perimeter of the blister as possible.
- Using a gauze pad or sterile swab, we would gently push the fluid out of the blister through the hole. If the blister was on the heal, the hole would be toward the foot. We would continue this process until the blister was emptied and just the blister “pocket” remained.
- Sometimes we would then soak another sterile swab with hydrogen peroxide and clean the open hole edge to kill any remaining bacteria that might sneak into the pocket.
- Following this, we’d smear zinc oxide onto the swab and pack the blister pocket with the zinc. The zinc has drying properties that absorb any excess fluid and keeps the new skin dry and aids healing.
- Then donut hole padding would be designed to fit over the lanced and drained blister and taped on so the athlete could return to activity.
- The process usually allowed the blister to heal quickly, the outer dead skin to dry rapidly so it could be cut off.
- The blister was care for with antiseptic, zinc and padding until it was completely healed.
- We did NOT cut the outer skin off immediately as this skin acts as a protective covering for the new skin forming underneath.
- Always make sure the skin is dry before treating it. We usually had the athlete come to us after they had their post-workout shower, or prior to putting on their socks and shoes for practice. If the skin around the blister was dirty, we’d clean it properly prior to treating and padding.
Alternative care—
If you don’t use a scalpel and just use a sterilized needle to poke a hole in the blister, which often occurs is a re-sealing of the outer skin and a re-filling of the fluid. Hence, another puffed up blister. If you don’t have a scalpel and want to use a needle, make sure it is properly sterilized and you poke several holes in the top and bottom of the blister and then gently drain toward one direction.
But always make sure you keep the wound (because a blister is a wound) clean, disinfected and properly covered.
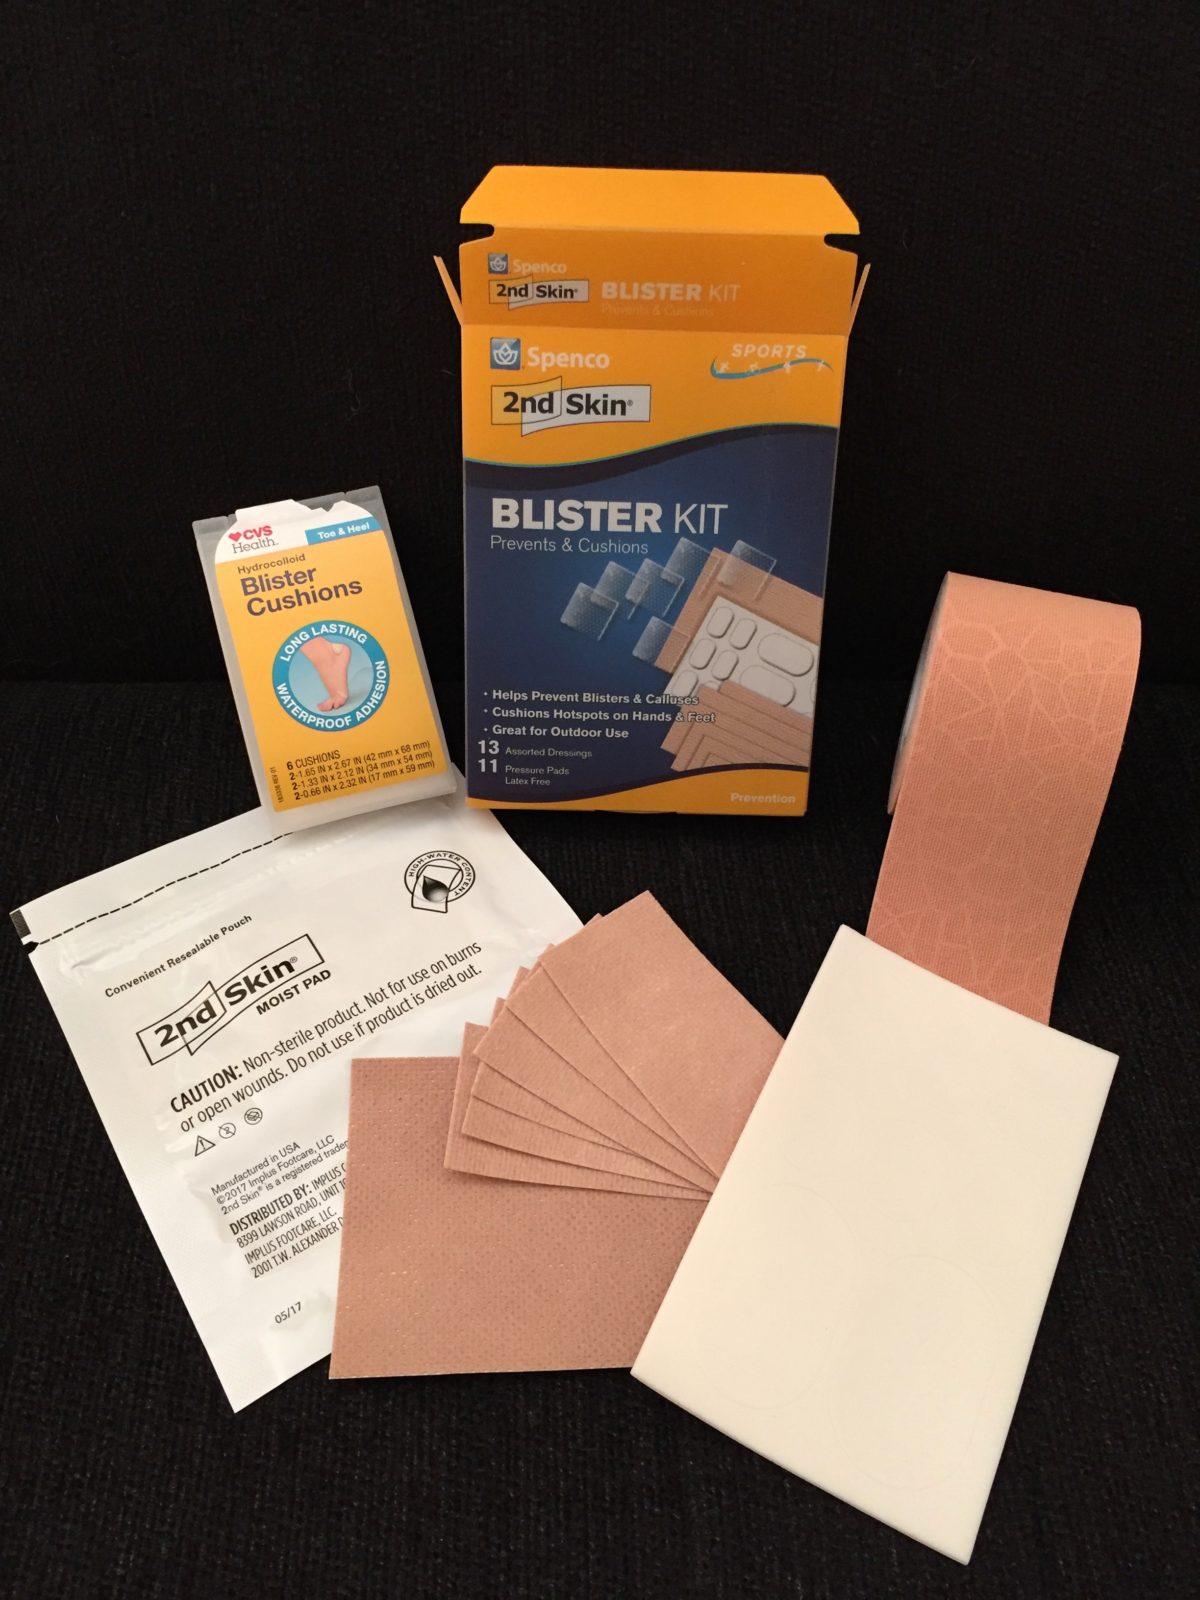
Fancy padding and materials—
When Spenco’s Second Skin came along we thought we’d died and gone to athletic trainer heaven! Just cut out the desired size for the blister (we got the stuff in rolls and sheets), lay it gently over the hot spot or blister, tape it on, and leave it there for several days, even through the shower, if the taping didn’t come off.
Now any searching in your neighborhood pharmacy yields a plethora of blister care material, like Spenco, Dr. Scholl, pharmacy brand name material and others. Little donut hole pads for toes and bigger pads for heals and balls of the feet can be purchased.
Keep it clean, Clean, CLEAN!!
Whatever treatment you opt for, you must make sure you keep the blister clean. If you’re a runner, hiker, or walk, it’s easy to get dirt or grime in the wound. Make sure it’s properly bandaged and always tended to following your exercise.
And I wouldn’t recommend washing your blister with regular hand soap that’s been sitting on your bathroom basin. You would be stunned to find out how many germs congregate and thrive on that soap!
What about blood blisters?
Personally, I would always opt for draining a blood blister. They’re painful. Blood is an irritant, and just draining the blister of that pressure and irritation goes a long way toward regaining some comfort.
But you always need to be on the lookout for an infection with this type of blister, so pay extra careful attention to its healing. Look for signs of pus, discolored fluid, redness and heat around the wound.
What about for blisters that really don’t need to be drained?
For smaller, or tiny blisters that don’t need to be drained, it wasn’t uncommon for us to just tape them down with adhesive tape, directly over the blister. This obviously pulls the skin off when you pull the tape off, but I often us kinesiotape directly over my small toe blisters. The tape stays on several days through showers and moisture and provides a protective, sticky coating.
And keeping it clean is one of the reasons I don’t like plain old Band-Aids. They don’t seal well around the blister and allow dirt and grime to enter the area. And because they don’t seal, they can end up rubbing on the blister, which further irritates it.
One product I love is medical-grade Manuka honey pads. They also provide a great covering that stays on in moisture, protects the wound with padding and promotes healing. But be careful. If you’re allergic to bees or any bee product, you shouldn’t use them.
What about blood blisters under toenails?
Blisters under toenails are especially painful. They need to be drilled and drained. A special tool (or VERY clean nail) is required for this, so don’t head out to your tool chest to get just any old sharp implement.
But what about how to avoid getting these pesky irritants in the first place?
That’s what we’re going to cover NEXT WEEK—steps you can take to avoid having to deal with blisters, so many of them, or such severe ones.
Until then, make sure you have a blister care kit available at home, and whenever you go out walking, hiking or running. You never know when you’re going to have to get off the trail, peel off those socks and shoes and treat a hot spot. If you don’t do it then, prepare to suffer longer than you should have!
Blessings,
Andrea
May you prosper in all things and be in health, just as your soul prospers (3 John 2).
Photo by Andrea A Owan