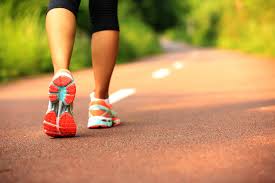
10 Steps to a Successful, Injury-Free Walking Program

You’re excited! You’ve decided to start a walking program and are ready to launch out on the streets and sidewalks around your house. Or you’re headed to the local recreation facility to pad around their indoor track.

You’re off to a great start!

Or are you?


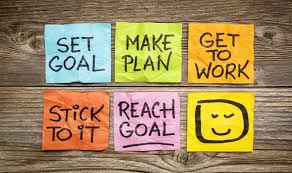
Setting a walking goal to improve fitness, and reduce injury risk—

Would you like to start a walking program, one that improves your fitness level and reduces your risk of injury? If you answered “yes,” then let’s get started!

If you haven’t read my previous post, May 23—“How to Begin an Effective Walking Program Part 1” http://andreaarthurowan.com/2018/05/23/209/blog, on choosing the right shoes, then make sure you do that first. Then grab a journal and start planning your 12-week program.


Follow These Steps to an Effective Program—

  1. Aim to walk at least 5 days a week. (I’m a proponent of taking a day off, so I walk 6 days out of 7. While casual walking on Day 7 is okay, your body will appreciate a brisk-walk break.)


  1. Always start out with slow stretching for your legs, knees and Achilles tendons.

It’s best if you can do some light calisthenics prior to stretching, so you can get the blood moving, and the body warm, which makes the muscles more responsive to stretching.


  1. Make the first 5 minutes of your walk a slower pace, so your heart has some time to respond. Don’t blast off like a race horse out the gates.


  1. Make your goal a brisk pace.

How is brisk defined? Brisk is defined as a 3 – 4 miles per hour pace. That’s moving at a pretty decent clip, with you breathing deeply while still being able to carry on a conversation.

Don’t worry if you can’t do the brisk walk right away. If you must, work up to it slowly.


  1. To avoid injury, plan to increase your walking pace by 10% a week, OR increase your mileage by 10%, BUT NOT BOTH!

This is where I probably differ with the National Heart, Lung and Blood Institute, that advocates increasing your walking time by 2 minutes every week.

To avoid acute, or chronic (long-term) injury, I insisted that my athletes and patients follow this 10% rule.

Let’s say you’re able to warm-up, and then walk a mile, followed by a cool down your first time out. You feel pretty peachy and proud of yourself. And you’re really tempted to push it to over one mile the next day out.

Don’t do it! Continue with your one-mile distance for that week, without pushing the speed up, either. Be patient, and give your body time to respond, without unduly stressing those previously dormant muscles, tendons and ligaments.

So many of my regular patients and competitive athletes tried to push through (or defy) this rule, and they ended up having chronic injuries that were difficult, if not impossible to heal. Better to take it slowly—and avoid injury—than have to back up, treat a persistent problem, and park it back on the couch for six weeks.

The following week, increase your mileage by 10% (to 1.1 miles) OR increase your pace by 10%, to 3.3 miles per hour.

By using that format, you can see where, as your mileage gets higher, your mileage jumps up very quickly. If you’re walking 4 miles and then increase that 10%, you’ll jump to 4.4 miles the following week.

Sometimes it takes longer than a week to move up another 10%, but don’t try to defy or ignore the one-week rule. Pay attention to how your body feels and is responding before deciding whether or not to increase your mileage OR your pace.


  1. Remember to keep track of your heart rate!

You may want to use your smart phone, or another fitness device, like a Fitbit to track your heart rate and blood pressure. If you’re aiming for a moderate (or a little more) cardio workout, you would want to stay in a 50 – 70% target heart rate range for the entire brisk walk phase.

(Please see my post http://andreaarthurowan.com/2018/04/25/the-best-way-to-calculate-your-exercise-training-heart-rate/admin/ 

to properly calculate your training heart rate using your resting heart rate as a guideline!)


  1. Do not sit down after your walk until you’ve slowed to a heart rate-reducing pace walk and performed 5 minutes of stretching.

It’s stressful on your heart to just stop exercising, without continuing to move around and “cool” down, so keep a leisurely pace until your heart rate drops to a comfortable level. It should begin to drop immediately after you reduce your pace.

And with all of that accumulated lactic acid making your legs feel heavy, and the flowing blood, puffed up tissues and muscles and on-alert nerves, you need to try to get it flowing out of the limbs so they can recover.

Contrary to popular opinion, lactic acid does not cause pain. It causes a heavy feeling and sluggishness. The blood and squeezing of nerves and vessels from muscle contraction can cause the pain. Elevating the legs for twenty minutes after exercise, or light massage with hand movement toward the heart (not toward the feet) can help with this.

And ice any joint or tissue that feels any pain twinge for 20 minutes. Make note of that in your journal.


  1. Set your goal for 40 minutes of walking 5 -6 days a week, including a 5-minute warm-up (after stretching) and a 5-minute cool-down.

The National Heart, Lung, and Blood Institute chart says you should be reaching that by week 12. If you don’t, don’t worry. Just keep at it—consistently—until you do.

It’s very important to be consistent. Rain or shine. Hot weather or cold. If you miss a couple of days, it usually isn’t a problem. If you miss a week, you may need to work back up to the level where you stopped before the blank week. If you’re over 50, your fitness level zooms downhill like a fast-moving roller coaster, so try as hard as you can to stay with it and be consistent!


  1. Aim for walking outside!

For a variety of reasons, fresh air is the best environment in which to walk. But if you don’t have a fresh air supply—because you live in the city—then find an indoor track to pad around. Or get on a treadmill in the gym. Treadmills are always a nice option because they can increase the exercise level with hill-like ramping capability.


  1. If you do walk outside, alter the direction you walk every day!

Ever been walking in an indoor track or rec facility track where they have you walk clockwise one day and then counter-clockwise the next? There’s a good reason for that, one you need to consider when you’re walking out on a road.

Another common problem I saw in my patients and athletes, especially runners, was chronic injury on their “downhill or inside leg.” The leg that always ended up closest to the curb on a street.

The problem arises from the fact that when you’re always running or walking the same direction, one leg is almost always having to compensate for a roadway that curves down toward the gutter, or curves inside toward the track. Day after day after day of that is stressful on the body. Change directions to keep your lower limbs from chronic stress. (The uphill leg isn’t happy about it, either.)

One problem with running or walking on a road, though, is that you should always walk against the traffic. That way they can see you. (Cyclists are to ride with the traffic flow, not against it. Just the opposite of a walker.)


So there you go! Ten tips for setting up a successful walking program.

But we’re not done!


In the future, we’ll look at when walking outside isn’t a good option, and what to do when you’ve reached your 40 minutes and start feeling as though you’ve hit a workout wall.


If you need some additional guidance, drop me an email at andreaarthurowan@gmail.com. Or leave a comment to let me know how you’re doing with the program.


And if you think this post might be helpful for someone you know, please share it!


NEXT WEEK: When you really shouldn’t be walking outside!

Until then,

Happy walking!

 Andrea

May you prosper in all things and be in health, just as your soul prospers (3 John 2).


*The advice in this blog is not meant to be a substitute for a physician’s recommendation or treatment plan!


NOTE:
If you have serious health issues, are on medications, or are over 40 and have been sedentary for a while, make sure you see your doctor first for approval or special recommendations.

Photo courtesy of Andrea A. Owan
How to Begin an Effective Walking Program (Part 1)

Want to get started on an exercise program but haven’t done any exercising for a while, or ever?

Try walking!


You’ve probably heard about the benefits of a walking program, like—

  • Social benefits
  • Brain health
  • Heart health
  • Toning and weight loss
  • and, best of all, Mental health—Getting Outside in Nature and Fresh Air!

We’ll cover the benefits in more detail in future posts. But today we’ll look at how to get a walking program started.


First things first—

If you’re just starting a walking program, what do you think you first need to consider?

If you said your conditioning level, you’d be partially correct. But we’ll cover that point next week.

The first things you need to consider are:

  1. Where you’ll be walking; and
  2. What equipment you’ll need.


Equipment? Yup. Those shoes you’ll put on your walking feet.


One of my specialties in sports medicine was the biomechanics of the lower extremities. A fancy title for how the hips, thighs, knees, legs, ankles and feet work together when moving, or ambulating, to be exact, on a surface. I would observe you walking across a floor or on a treadmill and discern where you had a biomechanical problem in any of those areas that might cause injuries in a particular joint or body part.

One of the courses sparking my interest in this area was the conference “When Your Foot Hits the Ground, Everything Changes!” And it’s so true! Your gait can cause a chain reaction that spreads clear up to the spine, trunk and shoulders. And neck and head.


I can’t stop evaluating people’s movements. It’s automatic for me to mentally assess everyone I see out on the road running or walking. I cringe when I see people running (or some version you’d try to describe as running) and know they’d be better off physically and efficiency-wise walking rather than doing what they’re doing. It makes me shudder to see them move. And my brain automatically compiles a list of all of the physical problems they must have, or will likely have from their efforts.


First—What’s your training surface?  

This is one of the first things a knowledgeable sales person will ask you. What do you plan to use your shoes for? Running, walking, cross-training, etc.

And you need to know what kind of surface you plan to train on.

Will it be asphalt, packed dirt, a combination, inside track, treadmill? Your surface will decide the shoe tread and style.


For example, I’m training to walk the Camino de Santiago, the pilgrimage path in France and Spain. It covers a range of surfaces, including asphalt, hard packed dirt and other assorted surfaces, if I wander off the main path. My first choice would be trail running/walking shoes. Why? Because they have great, nubby soles that grip uneven surfaces. They’re good for day hikes on mountain paths and trail running.

But those great little grabby nubbies will quickly break down on asphalt. For asphalt, I’d need a road shoe. So I may carry both with me.

Sound indulgent? For me, it’s critical. My feet are so beaten up and broken down from gymnastics and dance that I need shoes that will go the distance (and surface) for me. And because of my flat feet, plantar fasciitis and pronation-supination problems, I have to be really picky. My shoe choice is an Altra.

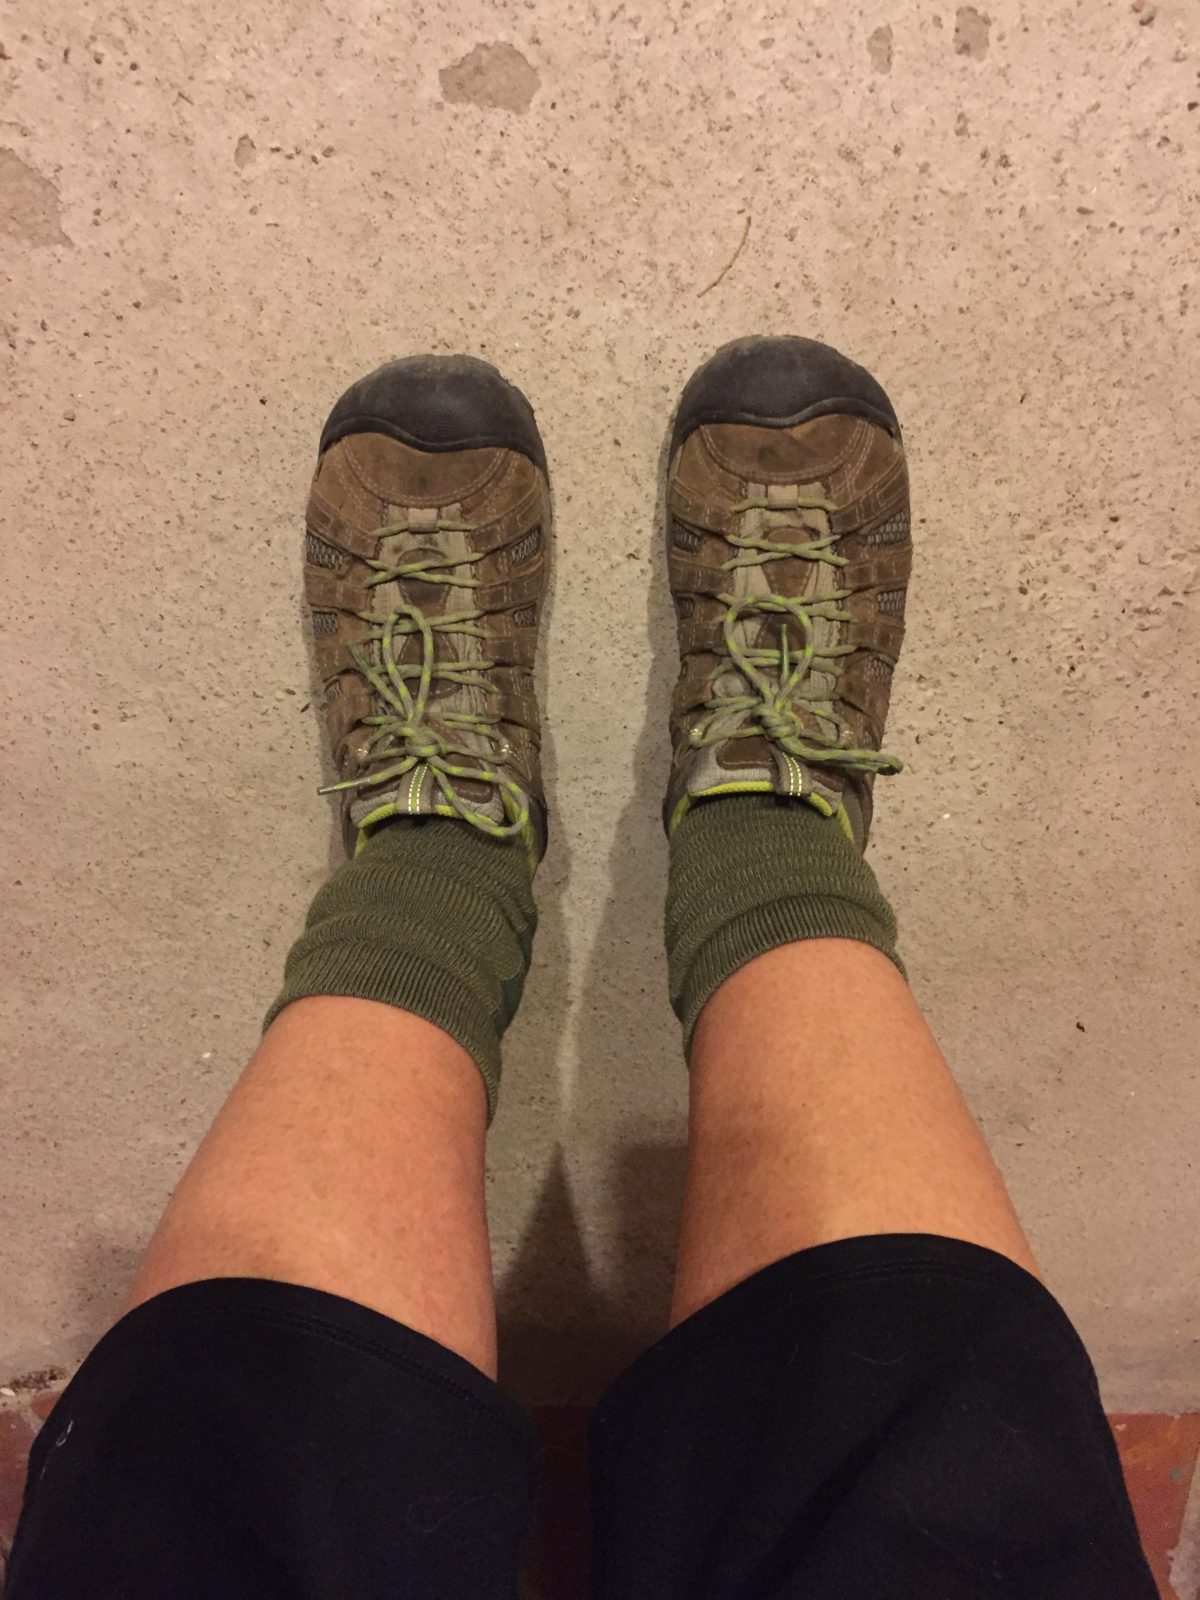
I fell in love with my Altra trail shoes, with their wide toe boxes that let my toes splay out, wiggle and breathe. I violated my own rules with them, though, and wore them everywhere, so they broke down quickly, and I have to buy another pair. This time, though, I’ll be buying both the trail and road models. And I’m also training in Keen hiking boots that have a lower ankle profile, since I don’t like the high ankle style. It’s too constricting for me. My older son swears by the higher ankle, though. The takeaway?


Get the type of shoes you need and feel comfortable in!


FYI: I DO NOT get any money from Altra shoes for recommending them. There are a lot of good shoes out there. Do your research, go to a good store, a store focused on runners and walkers and outdoor enthusiasts is best, although I wouldn’t recommend Big 5. While I have purchased shoes there (they often sell last year’s models at reduced prices), I know what I’m looking for. But I have my doubts about whether their sales staff is knowledgeable enough about shoes to make a good recommendation, or fit you properly.

I’m a REI shopper. Their staff is knowledgeable and helpful! Summit Hut would be another great place to go too. But in either case, I do not recommend purchasing shoes online, unless you’ve already tried them on in a store, or you’re re-ordering a shoe you know works for you!


Then—what shoes to buy!

When a patient came in to see me, one of the first things I did was evaluate their shoes.

  • Were they wearing running shoes or shoes made for walking or tennis, or just casual strolling?
  • What did the wear patterns on the bottom of their shoes tell me about their gate or issues they might have?
  • Did they need orthotics or “posting” in their shoes to help alleviate stressors?


And the big question?

Had they outworn their shoes? Had their shoes broken down to a point where they needed to be trashed and new shoes purchased. Take Note! A typical exercise shoe, if worn daily, will last you only 3 -5 months (although some manufacturers claim a longer period). Ask the sales person how many miles you could expect to put on the shoe before having to replace it. That will give you a better idea of how long they’ll last. But don’t balk at buying an expensive shoe. This piece of equipment is critical to your physical health! A fact most people never think about.


What shoe is right for you?

Shoes are usually built on what is called a last—a mechanical form having the same shape or form as a human foot. Back when I was in practice, most shoes were built on a man’s last, meaning everyone—male and female—had shoes built primarily for a man, with only minor modifications made. Yuck!

Today, women’s shoes are built on a women’s last (thank goodness!). And you have a wide variety from which to choose! (That can be a challenge just by itself!)

So the first thing you need to do is buy the right shoes! And to buy the right shoes, you need to make a few notes about what kind you need.


First, decide whether you’re a beginner, intermediate, advanced or extreme exerciser. Your answer will help in selecting the shoe that’s best for your ability level.

And PLEASE don’t plan to wear the shoes you’ve had in your closet for years, or the ones you use to clean up the backyard. Your feet change over the years, and you need shoes that accommodate that change. Do you have flat feet that need more support? Do you have high arches that need a ton of support? Do your feet roll inward when you walk? Does your forefoot roll outward when you push off?

Spend some time watching yourself walk, by walking toward a big mirror at a gym or at home. Watch your feet, how they move. Have someone stand behind you and watch you walk forward. What do they see? Write it down. Then take that information with you to a GOOD shoe store, one where the sales staff understands shoes and styles and customer needs, and don’t just try to sell you the “latest and greatest” and priciest model.

Try them on with the socks you plan to wear. Run around the floor with them on. Jump up and down. Don’t pick out the cheapest just because they’re cheap. Plan to spend some money and pick out comfortable shoes that do what you need them to do.

Your feet—and the rest of your body—will be so happy you did!


And take care of those shoes!

You’ll make a big investment in your footwear, so take care of your shoes so they can take care of you.

  • Lace them correctly!
  • Unlace them when removing them, instead of stepping on them with the opposite foot to yank them off. You’ll break down the back of the shoe.
  • Remove the liners/arch supports, if they come with them, to air out.
  • Keep them clean and remove the rocks and pebbles that might lodge in the treads.
  • Know how your shoes should be cleaned and clean them properly.
  • Don’t squash them in your bag or suitcase. Make sure they have room so they won’t get broken down when packed.


For those of you who would like to get a jumpstart on researching shoes, here’s a link to a great article in “The Strategist.” It lists some of what they think are the best running, training and workout shoes available for women and why. (They even have tips for beginners.) You can find good shoe recommendations for men on their site too.

Have fun shoe shopping!

http://nymag.com/strategist/article/best-running-shoes-workout-shoes-women.html


NEXT WEEK—we’ll talk about the progression of a good (effective) walking program and how to get the most benefit from it. I’ll give you some tips to avoid injuries and even cover why a walking program may not be good for you.


Until then,

Blessings,

Andrea

May you prosper in all things and be in health, just as your soul prospers (3 John 2).

Exercise: Where and How to Start

When you want to get started on an exercise program, how do you know where to start?

That’s the basic question, and most would-be exercisers get it wrong. While they might have a vague idea of where they’d like to end up, they don’t really know how to get there. And sometimes they don’t even know where they want to be. Then they start, stop, start again, get discouraged, and quit.

Today I’ll take you through the general plan you want to use when designing an exercise program. And I’m going to use the most basic of goals and exercises to give you an idea of where to start, where to aim, and how you can modify your program to suit your needs.


Determine your goal—

Do the first things first: ask yourself what you want to accomplish. It could be gaining muscle, losing belly fat, or wanting to run or walk a 5K race. Anything. Just make sure you have a good (honest) idea of where you’re starting from. If you’ve never walked or run a 5K, you won’t start your exercise program by charging out on daily 5K walks around your neighborhood. You’ll start with your baseline—the level of fitness you are today, at this time. Not what you wish you were. And then plan your progress from there.


Case Study—

I’ll use myself as an example.

It seemed to happen quickly, although it really occurred over the course of six months to a year. I’d been ignoring my exercise program, spending way too much time sitting in a chair in front of my computer writing stories and articles. I’d even given up my nightly calisthenics and walks with my Shetland sheepdog Dolly. (I wish she’d said something to me, although I should have gotten a clue from her plaintive looks.)

Anyway, one day I saw pictures the engineer took of the family, and I nearly gagged. (Actually, I did gag, before I got mad.) There in the picture, staring back at me were my face and chest, but someone else’s arms were attached to my body. Just when did my upper arms go from toned to fat? And when did they acquire that excess skin hanging under them?!

Yee, gads! Without my noticing, my arms had become old and flappy! Clearly I was no longer the toned athlete I once was and still envisioned myself to be. I took a hard look at myself in the bathroom mirror and raised my arm. It waved at me. Ugh! I thought I’d get physically sick in the sink. Instead, I got mad and decided I’d get even. And getting even meant doing some area-specific exercises to get those puppies back in shape!


Plan and process—

To get my arms back in shape, I had several options. I could get myself back in the gym and do some arm-specific machine weights or dumbbell lifting. Or I could pick up the dumbbells I have at home more often and use them. Or go back to doing my pushups every night before bed.

I decided on all three, but today I’m just going to show you how I use the pushups to get my arms under control.

Why pushups? Because they’re the easiest, most basic exercise you can do, at home, at your convenience, with no financial expense. And they can be done at pretty much any age, although you might have to modify the position slightly for your age and strength. There’s a reason pushups have been a staple in physical education classes for eons. They work!


So how would I start?

First, I wanted to increase my strength a little, so I set out the first night to do one set (yes, just one) of pushups. Because both wrists were damaged during my gymnastics career, I have to do bent knee style pushups. My wrists can’t take a full body load.

Since I was aiming to increase my strength, I did enough pushups to take me to the state of exhaustion, where I couldn’t lower and raise my body. One. More. Time. And that was it. Just one set. To exhaustion. For me, that ended up being around 35 pushups. All-the-way-down and all-the-way-up pushups. Not half-down types, or swayback with tummy touching the ground first technique. Real pushups.

And I tend to slow down when I lower myself to the ground and speed up when I’m returning to the starting position. Why? Because that’s a more optimal way to gain strength and increase muscle size with this particular exercise. It’s called negative (eccentric) loading. But that’s beyond the scope of today’s post. We’ll cover that in a future post.

And then I stand and stretch out my chest and arms. You ALWAYS want to stretch to keep your muscles as healthy and responsive as possible.

The following evening I repeated the pushups, to exhaustion. I ended up making it to the same level, about 35. If I find myself being able to do a lot more, then either something was wrong the night before, or I didn’t really work to exhaustion the first night.

Every night I continue like this. I don’t set a number to achieve, although I do make sure I don’t increase my number more than 10% of the number achieved the night before. (Exercise rule.) If I can do a couple more, I’ll do more. But what usually happens is that it takes at least a week for my body to build up to a comfortable 35, where I notice that it no longer feels like burning, I-just-can’t-pump-out-another-one exhaustion.

After several (3) weeks, I should be up to 40. And I can keep going like this for months, increasing the number of pushups.


Modifying your program to meet your needs—

But I have a body issue to consider. My muscle makeup is not average, or normal. I don’t have 50% red, long distance, marathon-type muscles and 50% white, speedy-type muscles. My body is made up mostly of speedy type muscle fibers, which means I can gain muscle strength and size (bulk up) really quickly. And that’s not what my ultimate goal is for my arms.

I want them lean and contoured. Toned. So what now?

I switch my program up. I’ll still use the pushups, but now I’ll perform them a different way.

The first night I’ll do 12 pushups and then rest for 30 seconds. Then I’ll do 12 more pushups and rest for 30 seconds. And I might do them faster, the same speed up as down. I’ll do at least three sets like this, maybe more. A lot more. This way I’m focusing more on tone, the endurance type of muscles that will give my arms a more toned appearance. And in the process, my chest tightens up and lifts those breast muscles so they look a little perkier! Pushups are A+ exercises for chest muscles. (Not a bad payoff!)

That way I can whittle away at the fat, and slim the muscle down to a nice shape. Like a sculptor chiseling away at a hunk of marble or clay.

You can apply this same principle to your legs to strengthen and tone your thighs and outer thighs and calves.

You just need to know what your ultimate goal is and then figure out the steps to get there!


NEXT WEEK: We’ll look at walking and how to plan your workout for that activity.

Until then,

Happy pushupping!

Blessings,

 Andrea

May you prosper in all things and be in health, just as your soul prospers (3 John 2).

Photos provided by Google Images

How to Determine Your Target Heart Rate Goal

So now you’ve measured and know your resting heart rate and have an idea on how to determine what your target heart rate should be during exercise. (See my post last week http://andreaarthurowan.com/2018/04/25/the-best-way-to-calculate-your-exercise-training-heart-rate/admin/).

Now what?


Setting some goals—

This is the exciting part. Where you decide what your exercise goals are. Spend some time thinking about this one. And consider your age, current physical condition, and what type of exercising you would like to do, and will stick with. Do you want to:


  • Lose weight?
  • Put on some muscle and have nicely contoured arms and legs?
  • Tone up what you’ve got?
  • Increase your lung capacity and improve your heart function?
  • Maintain your current level of conditioning?
  • Run a 5K, or triathlon?
  • Increase your reaction time and power or speed?
  • Just get stronger?


What fitness goal you choose will determine how you exercise, where you exercise, what you do for exercise, and what exercise heart rate you’ll aim for.


Conditioning, toning, power, or aerobic capacity—

As a general rule, for general conditioning goals, you will want to exercise at a heart rate level of 50 to 70%.

As we saw last week, for someone my age (60) and resting heart rate of 58, (don’t forget to use that as your base for proper calculations), I would want to exercise at a level that keeps my heart rate between 109 bpm and 129 bpm.

At the lower rate of 109 or even up to 120, I could maintain a reasonable exercise rate—like walking at a 3.0 mph walking rate—for two to three hours, or longer. As long my knees and feet hold out for me.

If, however, I want to work on power and strength, which I sometimes do, (for toning, muscle definition, and muscle power), I’d want to push my heart rate up to a higher level, say 80 to 90% of my heart rate maximum, again with my resting heart rate as a critical factor in the formula.

When I use the 80 to 90% range, and plug those numbers into the formula we covered last week, we arrive at a target heart rate range of 140 to 150. That’s a rate I wouldn’t be able to sustain for an indefinite period of time, though. In fact, I probably wouldn’t try to sustain it more than 20 minutes, if I were hitting a 140 – 150 bpm rate throughout the entire 20 minutes.

I could, however, go longer, if I were ramping my heart rate up and down as I exercised, as sometimes happens when I’m walking on the treadmill and increasing the ramp angle considerably to mimic hiking uphill and then lowering the ramp angle to a slight or flat grade.


 Working up to your target level—

But even if you know what your target level should be, you may need to take it slowly and work up to your desired level. If you haven’t exercised for a while, are recovering from an illness, or you’re changing up your exercise program for some reason—because your goals have changed—you’ll want to work up to a level where your heart rate is being stressed a little but not so much that you have a difficult time breathing, feel weak, or can’t maintain that level of exercise for five to ten minutes. Or, after exercising, your heart rate takes longer than it should to come back to normal.

Again, if you’re just starting an exercise program, make sure your doctor is in agreement with what you want to accomplish and gives you the thumbs up on the program you’ve designed. She can also help you design one!


Where do you go from here?

I know all of this probably sounds a little—or a lot—vague, but as we progress, we’ll look at more specific exercise goals and see what a training program might look like for you. If you’re already on an exercise program, you might see some ideas here that will help you improve or stress yourself a bit more.


I forgot to provide an answer!

A couple of weeks ago, I asked if you knew which athletes typically have the highest VO2 maximums. I promised to give you the answer the following week—and then forgot! Many apologies for my forgetfulness!

The answer is: Cross-country skiers. They have HUGE lung capacities. One reason is the long distances they ski, but it’s also because they’re using nearly all of their bodies when they’re exercising at those long distances. It’s a grueling sport.


 What’s coming up?

NEXT WEEK, “Workout Wednesdays” will be on hiatus. I’m heading to Philadelphia this weekend for an intensive writing/editing workshop with the Guideposts editors and eleven other writers; and my younger son graduates from college the following weekend.

I’m trying to take my own advice and live a balanced life!

So I’ll see you back here May 16!

Until next time, keep working on setting your goals!

Blessings,

 Andrea

May you prosper in all things and be in health, just as your soul prospers (3 John 2).

Photos courtesy of Google Images

The Best Way to Calculate Your Exercise (Training) Heart Rate

Have you ever spent weeks or months exercising following all of the rules of exercise engagement and not made any progress in your training? There may be a reason for that, and it may have to do with how you’re monitoring and setting your exercise heart rate.


Last week we looked at the importance of knowing what your resting heart rate is and how it can be an indicator of your heart health. We also discussed what the standard maximum heart rate and exercise heart rate ranges are, the ones you find most often printed on the treadmill or stationary bike at your gym.


Then I ended the post by saying that the most common formula is often not the most accurate or best way to determine your exercise heart rate. Today I’m going to tell you why and show you how to get the measurement you need.


Exercise heart rate review—

Let’s begin with a short review about what happens to your heart rate during exercise.

Your heart rate usually rises during intense workouts, prolonged long-distance (aerobic) exercise workouts. Your heart’s maximum heart rate is the rate at which your heart is working at its hardest to supply oxygen to your body. In exercise, this is the rate that can only be sustained for several minutes.

Your maximum heart rate is a function of aerobic capacity—the amount of oxygen your body is able to consume, or the heart’s ability to pump oxygenated blood to your muscles. When an exercise physiologist measures it, she’ll write in terms of VO2 max and actually measure the volume of oxygen you move through your lungs during exercise. The more conditioned you are, the higher your VO2 max usually is.


As you exercise and your fitness level improves, the body ramps up in efficiency, at metabolism and everything else it does. Your gastric motility improves—the speed and efficiency at which your body digests and moves food through the digestive tract. Your muscles get stronger and more efficient. Your body actually makes more capillaries in which to circulate oxygenated blood to those muscles, and your lungs become better at moving those oxygenated blood cells through the transport system. (Do any of you remember the People Mover ride at Disneyland? It’s like that. The blood cells line up to load the oxygen and then get whisked away to the distribution sites. The movers are filled to capacity, rather than moving out partially loaded.)


Knowing what your maximum heart rate level should be during exercise is fundamental to setting effective exercise parameters and goals.


If your fitness level is improving, and you really want to keep improving it, how do you calculate your maximum exercise heart rate?


Last week we looked at this scenario:

You go to the gym, hop on a treadmill or stationary bike and see the maximum heart rate formula and exercise intensity graph to indicate where you should be exercising for your age.

The basic formula is: 220 minus your age multiplied by 50 to 70%


So let’s punch in some numbers.

If you’re 40 years old, your max exercise heart rate will be 180 bpm. What does that tell you? It tells you that 180 bpm is the highest heart rate number you should obtain while exercising at your maximum level. But you’ve already seen that the maximum level can only be, and should only be, sustained for no more than several minutes.

So, unless you’re planning to exercise for just two to three minutes, how do you decide what heart rate you should be exercising at?

The percentage number you use really does depend upon what you’re trying to achieve. Do you want to work on your power, the speed you can move a barbell from your chest to an overhead position? Maybe explode from a crouched over position in a 100 meter sprint? Or do you want to get long, lean muscles?


What if you just want to work on your general fitness level, or burn off some of that pesky fat that accumulated when you weren’t looking?

I promise we’ll get into more specifics about what percentage is likely to be best for you, but today we’ll stick to discussions about averages. For most people, they want to aim for 50 to 70% of the maximum heart rate of 180. So the formula for would look like:


Max HR formula: 220 minus your age multiplied by .50, .60, or .70


So, with 220 minus 40 we arrive at our 180 and then multiply that by 50%. That number would be 90 bpm. As I noted last week, that number doesn’t sound very high. But it can be very effective for someone trying to maintain their fitness level, is a beginner, or is planning to walk the treadmill for an hour or more at a moderate pace.

This is the average. And as handy as averages can be sometimes, they often don’t tell the story you want told. So we want to get more specific. We want to ask a different question.


Using gold standard formula for setting your exercise heart rate—

If your fitness level and heart function are improving, and you really want to keep improving, how do you calculate your maximum exercise heart rate?


You want to use the Karvonen Heart Rate formula, the gold standard in exercise heart rate calculations.


Let’s go back to the max heart rate calculation formula. Only now, we’re going to tweak it for exercise and use that important information you gathered about heart rate a couple of weeks ago. I’ll use the 40-year old example again.

Ms. 40-year old Lulu Lemon jumps on the treadmill at the gym. She’s in better-than-average physical condition, because just that week she measured her resting heart at 65 bpm, not the average 80, which is what is used for the average formula posted on the treadmill she’s on. But she doesn’t want average. She wants personal!

So, she takes that 65 bpm number and plugs it into a more accurate formula to determine her maximum exercise heart rate—


Formula steps—

  1. 220 minus her age of 40 = 180
  2. Now this is where the change starts. This calculation will tell her what her heart rate reserve or cushion is.

180 bpm minus her resting heart rate of 65.

180 – 65 (resting heart rate) = 115 (heart rate reserve)

  1. Ms. Lemon wants to focus on a fat-burning workout for this session, so she plans to walk at 50 to 70% of her heart rate reserve. So she calculates the range this way:

115 (heart rate reserve) multiplied by 50% = 57.5

115 (heart rate reserve multiplied by 70% = 80.5

This gives her a nice percentage range to work within, but now she needs to know exactly what her exercise heart rate should be within those ranges. So she returns to her resting heart rate for the final calculation.

  1. 65 (resting heart rate) + 57.5 (50% of her reserve) = 122.5 bpm

   65 (resting heart rate) + 80.5 (70% of her reserve) = 145.5 bpm

So Ms. Lemon knows that she can safely and effectively exercise in a heart rate range of 123 to 146 bpm.

Abbreviated, the formula looks like this:

220 – 40 = 180 (max heart rate)

180 – 65 (resting heart rate) = 115 (reserve heart rate)

115 x 50% = 57.5; and 115 x 70% = 80.5

65 + 57.5 = 123 exercise heart rate (rounded up); and 65 + 81 = 146

a 123 to 146 bpm target exercise heart rate range


What difference does it make?

Tons! A quick look at what Ms. Lemon’s target rate would be if her resting heart rate were 80 tells you that this target range would change from 123 to 146 bpm for the lower rate of 65, to the higher range of 130 to 155 for the higher rate of 80.

Do you see the difference? Ms. Lemon is in better condition, so she doesn’t have to maintain as high of a target heart rate range as her 80 bpm counterpart. In short, she doesn’t have to work as hard because her body is already more efficient! Cool, huh?


Let’s look at an older (just got my senior movie discount) lady like me—

I’m 60 (just), with a resting heart rate of 58. (An anesthesiologist once quipped he could make it lower during my surgery. Ha! Funny guy. No doubt he could take it to zero!)

Anyway, my calculations would look like this:

220 – 60 = 160 (Eek! I hate to look at that low number.)

160 – 58 (my resting heart rate) = 102 (reserve heart rate)

102 x .50 = 51; and 102 x .70 = 71.4

Add my resting HR of 58 to 51, and I get a minimum exercise heart rate of 109.

Add my resting HR of 58 to 71.4, and I get a maximum exercise heart rate of 129.

So, if I want to burn some fat, I should exercise within a heart rate range of 109 – 129 while I’m plugging away on the treadmill next to Ms. Lemon, who has to (and can) work harder than me.


Can you work in higher ranges? Sure. But as I’ve said before, it will all depend upon what your exercise goal is.

We’ll look at some of those goals and target differences next week!

Until next time,

Happy heart rate targeting!

(If you like this post and think it might be helpful to others, please pass it on. Or if you have a question, send me a comment in the comment box. I’d love to hear from you!)

Blessings,

Andrea


*You should always check with your doctor about what your target heart rate should be if you’re taking medication for a heart condition.

Photo courtesy of Google Images