Black Friday OptOut(side)

It’s Black Friday.

‘Tis the season to stand in line for hours and go nuts at the malls.

Did I need to tell you that?

What do you plan to spend the day doing?

Shopping? Eating leftover turkey, stuffing, potatoes and pie?


How about an alternative option. One that has health and wellness and saving money written all over it?


Skip Black Friday shopping and do some playing outside!


Yup. Get out in the great outdoors for some creation viewing and inhaling!

Breathe fresh air.

Break a sweat.

Sunbathe.

Go canoeing or kayaking. Hike. Run. Grab a bunch of friends and play soccer in the park. How about Frisbee with your dog? Riding a bike along a bike path. Going to the dog park. Enjoying a café con Leche al fresco with a friend.

Take a stand and rebel against the same old, against the world’s marketing giants.

Source of my rebellion—

The Camino. That’s what did it. And this is yet another example of how that journey changed me.

I haven’t done the Black Friday shopping bit for years, but I have perused the websites online, the ones that tease me to get in on the cyber action three days early, so I can be a savvy shopper. So I can feel good about the bargain I scored.

On The Camino I rejected news, marketing and teasers. I focused on my purpose and spiritual journey.

I spent most of my day outside in the caressing sunshine and sweet smelling (or sometimes dust-cloaked) air and realized how much I missed being outside. How good it made me feel physically, (there are extreme health benefits that come from being outside), emotionally and spiritually, untethered from my computer and household work.


Let’s go back to the spiritual benefits—

Isn’t that what we kicked off yesterday? Christmas? The most celebrated spiritual season of the year?

So why not focus on it? Why lose yourself in the shopping hype and drain your bank account? Why drive around endlessly looking for a parking spot at the mall?

Be a trendsetter. A rebel.


Choose to OptOutside!

Join REI as they celebrate their Day in. Day out. Celebrated on Black Friday when they’re closed for business, to encourage outdoor recreation.

Four years ago they had the gumption to change their status quo business model and decided to close their doors, and still pay their employees! On Black Friday.

Imagine. Some conscientious capitalism.

As they say on their dedicated website:


“It’s about the routines—the ones we need and the ones we need to rethink.”


So how about joining them in the rethinking.

For more on the benefits of going outside, head to their special website.

And spread the word!

#optoutside


NEXT WEEK:

What does depression look like? Could you recognize it in a co-worker or loved one?

In this season of making merry, we need to remember that for some it is the most profoundly depressing time of year. We can’t assume that our friends, fellow churchgoers, and co-workers are doing okay in this area just because they’re showing up and participating and getting the job done.

Next week I’m going to give you a great info graphic, courtesy of my friends and professional psychologists at BetterHelp.

It will give some great information on identifying functional depression and tips on the getting the help functional depressants need.


Until then,

Blessings,

Andrea

May you prosper in all things and be in health, just as your soul prospers (3 John 2).

First photo by Dieter de Vroomen on unsplash

Second photo by Sabina Ciesielska on unsplash

Blister Care on the Camino de Santiago: A Personal Case Study

The pilgrimage was a success, emotionally and spiritually, and, for the most part, physically! I even got comfortable with carrying 23 pounds. By the end of the trip, I didn’t even notice the weight, and neither did my arthritic back!

Unfortunately, though, I injured my right knee and didn’t stay off of it enough. The last day of walking pretty much did me in. It was too far—15 miles—too fast on a bad leg. Then I tramped 7 miles across Paris to ascend the Eiffel Tour. Now, I’m back to very low daily mileage, icing and making sure I put my leg up every afternoon. That usually means a nap accompanies the leg elevation, which isn’t such a bad way to spend a rainy fall afternoon.

But most of the other days were rousing successes physically, actually better than I hoped, including the blister prevention and management. Here’s a quick rundown on that aspect of my journey:


Daily rituals—

The morning prepto start walking usually went like this:

  1. Make sure all strategic body parts (like the sore left ankle) were clean and properly supported with Kinesiotape.
  2. Kinesiotape the ball of my right foot.
  3. Tape (usually with Kinesiotape) the second, third and fourth toes to avoid blisters.
  4. Slather the heals and toes with Foot Glide cream.
  5. Put the light sock liner on.
  6. Sprinkle Gold Bond medicated foot powder (to absorb moisture) in the main sock, squish it around for good coverage, and put the sock over the liner.
  7. Slide gaiters over my ankles before putting shoes on.
  8. Place lambs wool in the right toe box to cut down on toenail bruising from foot sliding forward in the shoe and banging on the toe box. (This worked wonders! I knew my ballet training with toe shoes knowledge would come in handy some day.)
  9. Insert foot in shoe and make sure no seams or bunched up sock areas are annoying or noticeable.
  10. Properly double tie the shoes and attach gaiters to laces and spread them down around the heals and mid-shoe areas.
  11. Make sure my toes were comfortably spread out while walking rather than scrunched up in the shoes.


Post-walk ritual—

  1. After peeling off soaked clothes and taking a shower, dry feet thoroughly and check for blisters and hot spots, and then check toe nails, cuticles and rough skin that needs trimming and filing. (I tried to keep my feet and toes as smooth as possible, without grinding off all of the calluses on my big toes and heals. I used a fairly rough mani/pedicure board for this.)
  2. Walk around the rest of the afternoon and evening in open-toed flip-flops to make sure my feet stay dry. Sometimes my Kinesiotape stayed on in the shower, so I kept it on the body parts it was anchored to the next day.)
  3. Slather feet with lotion and put socks on to sleep in.


Even with this ritual, which I adhered to religiously, my fourth toes sprung leaks with some nasty blisters; the one on the right toe had two blisters with one under the callus that runs down the middle of my toe. The other toe had a pretty sizeable blister, probably because I didn’t correctly place my blister pressure pad on it a couple of days and ended up increasing the shear rather than decreasing it.

The results—

No matter how hard I tried, I couldn’t keep those fourth toes blister-free, which is probably due to the fact that they curve and twist like little commas, due to all of the time I spent with them hooked around a balance beam while growing up. So I had to do some minor surgery on those.


First steps in dealing with the blisters

This is where the Spenco 2ndSkin and moleskin strips and cutouts saved my life.

  1. For several days, I provided extra padding over the blister and around the toe to protect the tender, elevated skin and keep it from breaking. A little piece of Second Skin cut to the length of my toe was placed over the blister and then covered with Kinesiotape or moleskin. If it was just a hot spot I was tending to, I applied a generic blister pad.
  2. Then I decided I needed to do some lancing of the one blister because it appeared to be getting larger. So I sterilized my cuticle scissors and made tiny slices at the base of the blister and gently pushed the fluid from the blister. Then I went through the same padding procedure.
  3. But one blister was a toughy. It kept re-sealing itself, so I kept cutting. Several slices on the last go around to make sure it stayed drained. Then I applied the Second Skin and wrapped it across the top and around with moleskin. To alleviate some pressure and attempt to straighten out the toe a bit, I placed a small wedge of lambs wool between the fourth and third toe.
  4. In spite of pretty fire-red blisters and skin, I walked a lot of mileage without blister pain. Now, about 10 days after completing the walk, I’ve snipped off the dead skin layers. And we’re back in business!


Survival kit—

My toes wouldn’t have survived without my blister care arsenal:

  • Foot Glide
  • Double-layered socks
  • Sock liners
  • Drymax socks (these are now my favorite go=to socks!)
  • Moleskin
  • Spenco 2ndSkin
  • Kinesiotape
  • Toe clippers and scissors and cuticle clippers
  • Told Bond Powder
  • Kinesiotape

I also used Desitin Maximum Strength cream for its zinc oxide protection and drying, and its medicated healing capabilities. That was applied at night after a thorough cleaning and drying and before putting on my socks.


Toward the end of the journey, I was measuring and pre-cutting my tape and moleskin to reduce the morning prep time. And I actually had to snap Chris’s Kinesiotape from him to enlist on my feet, legs, knees, and ankles. Good thing for me that he didn’t need it!


Other pilgrims’s foot woes—

We ate dinner one night with a gentleman who was walking the Camino for the second time. He recounted his devastating first experience, with such severe blisters that he couldn’t walk. Some of them broke on their own and ended up getting infected after he showered without wearing shower sandals. Then he contracted something like trench foot. Only after he managed to secure some hefty antibiotic did the infections subside and he finished his walk. It sounded ghastly!

In one of the hostels I watched an older French couple sitting in the lounge. She had her feet on his legs, and he was lovingly applying ointment and bandages to her blistered feet and toes. Her oooh, ooh, ooh’s were replaced by grateful sighs when he carefully slid socks on her feet and tenderly massaged them.

Then, on our last official day of walking, Chris and I encountered a pilgrim perched on a large boulder on the side of the path. Her foot was a mess, and she was trying to improve her predicament by taping a large-wound Telfa pad sheet (like the kind you see with the “plastic” side to control fluid draining and infection) on the bottom of her foot. She had it cut (as closely as possible) to the shape of her foot. I suspect she was trying to reduce friction. It didn’t look as though it was going to turn out so well for her.

She looked miserable.


Not to be taken lightly—

Blister problems can be more than annoying and painful. They can be dangerous. And they need to be taken care of immediately. I’m fortunate to know how to care for blisters and be able to take care of them on my own. But even my blister ailments could have gone south very quickly. The one blister got so red I became concerned about infection. I applied triple antibiotic cream to it for a couple of days as a precaution.

I was fortunate.


Planning and preparing for problems—

If you’re planning any long distance hiking, make sure you prepare your feet well by training, wearing the right shoes for your feet, wearing friction-reducing sock liners and attending to your hot spots as soon as they crop up, NOT after you’ve put in your mileage. If you wait until the walk is over, it might be too late to get control over them. Stay vigilant.

Be prepared.

Make sure you’re all set so you can enjoy the walk!


NEXT WEEK we’ll take a quick look at more equipment you don’t want to hike without. Equipment that can reduce the stress on your joints and feet.

Until then, take care of your feet so they can keep you moving!

Blessings,

Andrea

May you prosper in all things and be in health, just as your soul prospers (3 John 2).

Photo of my own toes taken by me!

Multi-Day Hiking Blister Prevention and Care Kit

AS YOU’RE READING this blog post, I’m either sleeping or out walking on the other side of the world. A dream and Heavenly direction that began a little over a year ago and that has involved months of study, preparation and training has arrived. And my beloved and I are on a life-changing pilgrimage. At least that’s what everyone who has experienced it says it will be, and I have no reason to doubt these friends. That’s the expectation we have.

But preparing for this hasn’t been easy. Especially in the what-to-take category. Most specifically in what to take in case of …


My background in play

As an athletic trainer, I’m used to carrying around an arsenal of goodies to treat athletic mishaps on the spot. Whether it’s blisters, nosebleeds, dislocated fingers, broken limbs, brain-jarring concussions or spinal injuries, we’re prepared.

While the books I’ve read tell me that the countries I’ll be in really do have nice grocery stores and pharmacies, that won’t do me a lot of good if I have to hobble ten miles through a forest or pastoral farmland before reaching one. So, I aimed to be prepared. But prepared meant a small amount of items in very small sizes. Things that would fit in the portable “house” I’m carrying on my back and help aid my walking comfort and sanity.


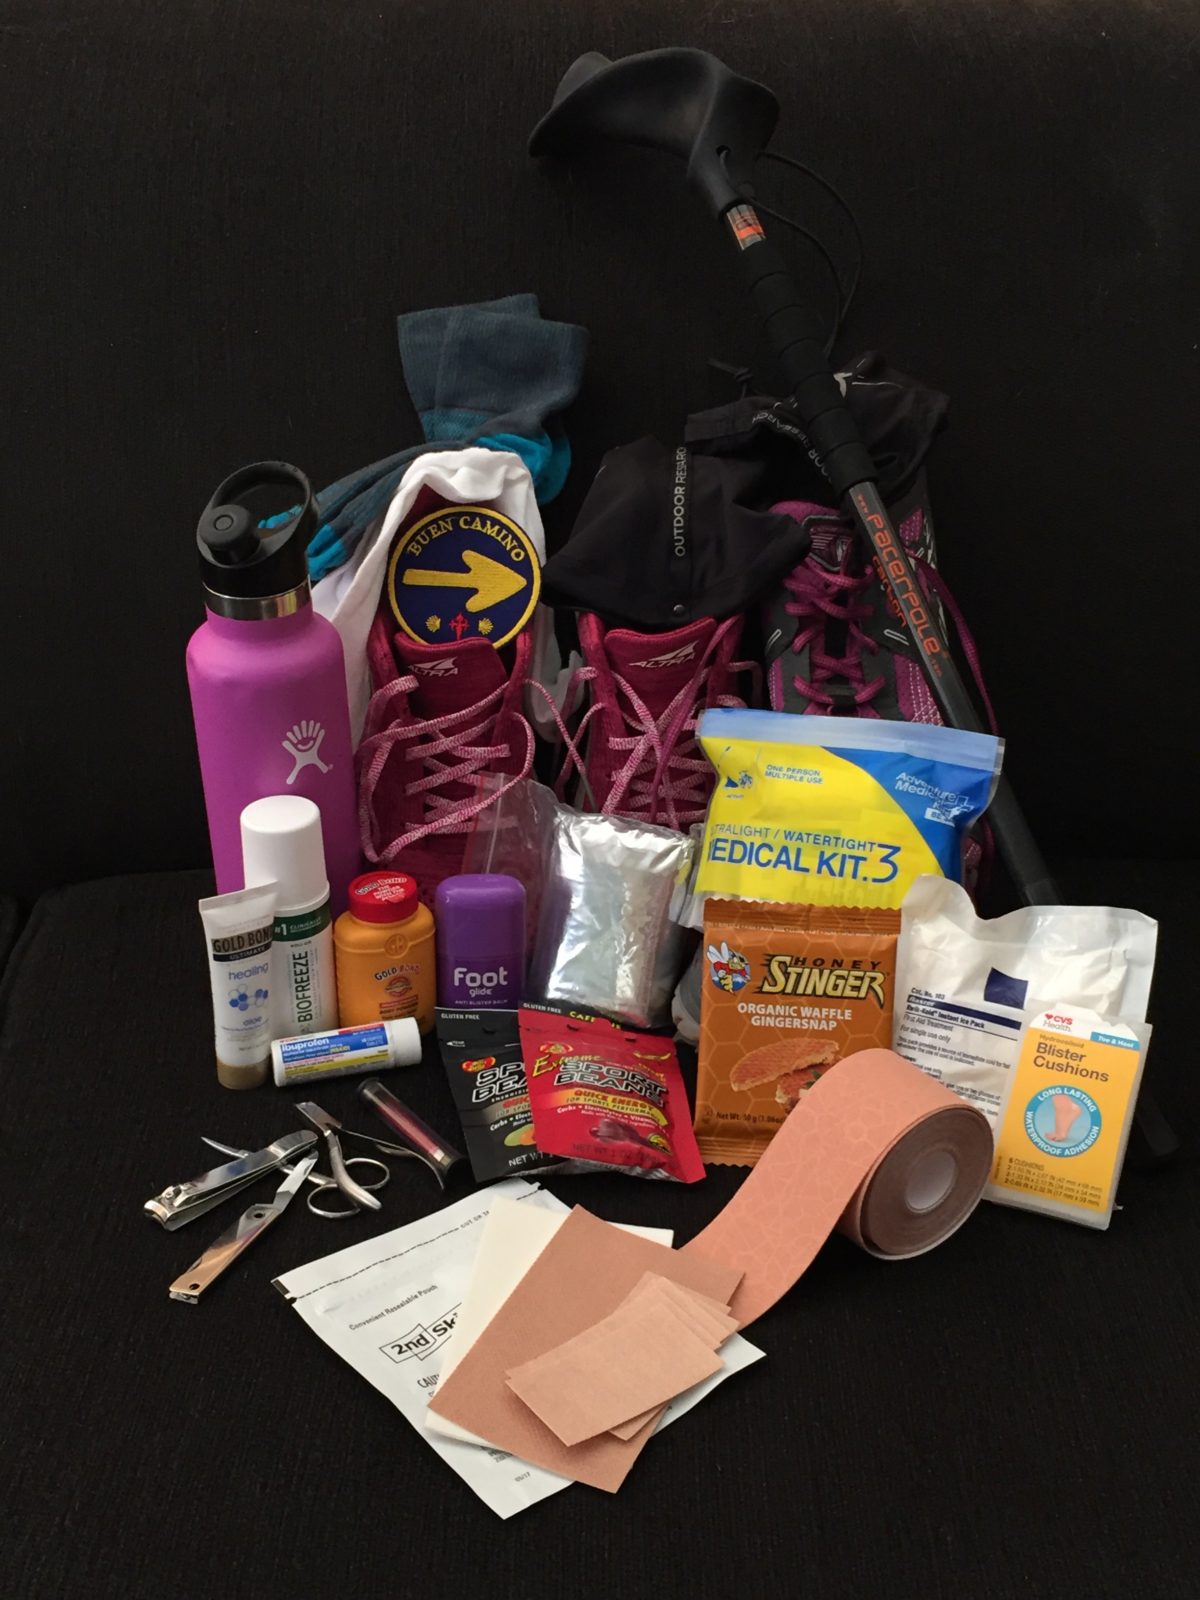
My hiking mini-arsenal for my feet—to prevent and treat foot injuries and blisters—and why I selected these items: 

  1. Two pairs of shoes, a road/trail shoe and a strictly trail pair.

The road/trail shoes provide more support and handle the pounding my feet take on asphalt, which I will be walking on. When I hit the dirt trail, though, I’ll switch to the trail shoes. Better, more lax and forgiving structure for wobbly surfaces.

I had to make the difficult decision to forgo my Keen hiking shoes. I knew I needed to take two pairs of shoes, and the hiking boots are too heavy and too big to fit in my backpack when I’m wearing the other pair. I didn’t want them swinging back and forth on my backpack, either. These Altras are more compressible.


  1. Hiking Poles!

As I mentioned in my last post, I wouldn’t go anywhere without my beloved hiking poles. I’m taking a pair of poles made in England, called Pacer Poles that my younger son gave me for Christmas. I like them because they help me navigate rocks and take the load off my knees, especially on descents.  They’re light and the hand grip has an anatomical/ergonomic slant to it, which helps me avoid irritation to my compressed wrist nerves.


  1. Water, Water, Water!

As far as my body and I are concerned, one can never carry enough water. I’m prone to dehydration, especially in heat, so I always need to have water available. No waiting until the next fountain makes its appearance. It reduces my chances of suffering a migraine or other effects of insufficient hydration. Even if it adds weight to my pack (and back), I’ll be loaded up.

Staying hydrated also reduces my chances of getting swollen feet.


  1. Electrolytes

Along with the water, I’ll need to replace electrolytes lost through sweating. I’ve found the Sports Beans brand to help me immensely and perk me up. One bean every fifteen to thirty minutes.


  1. Energy Snack

I discovered the StroopWaffle-style portable energy snack at Seattle’s REI in June, and I LOVE them. I’ll be taking the Stinger brand with me, because they still make a variety of flavors besides chocolate and caramel, including our favorite ginger flavor. They’re easy to pack and eat on the run (or hike) without too much down time or fanfare.


  1. Kinesiotape

I’ll be taping my left ankle, several toes, left hamstring, (allowing that to hurt changes my gait and thus overloads my feet), and left outside foot area, and the ball of my right foot. My tape is a godsend to me. It will also be handy in a pinch to cover a hot spot.


  1. Foot Glide

This is the lubricant I use to apply a light glaze to the ends of my big toes and heals and the ball of my left foot. Works great to reduce hot spots.


  1. Double-layered socks

These socks are light enough and padded enough to be comfortable in my shoes and reduce the friction and shear forces I’ll confront over miles of walking day after day.


  1. Sock liners

These will go on under my double-layered socks. They wick sweat away from my foot and provide an extra layer of friction and shear protection. They’re so thin that they don’t provide additional bulk that make my shoes too tight.


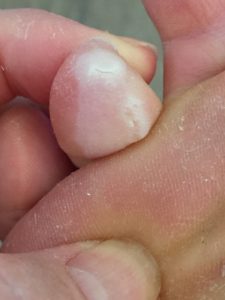
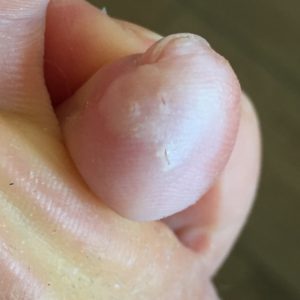
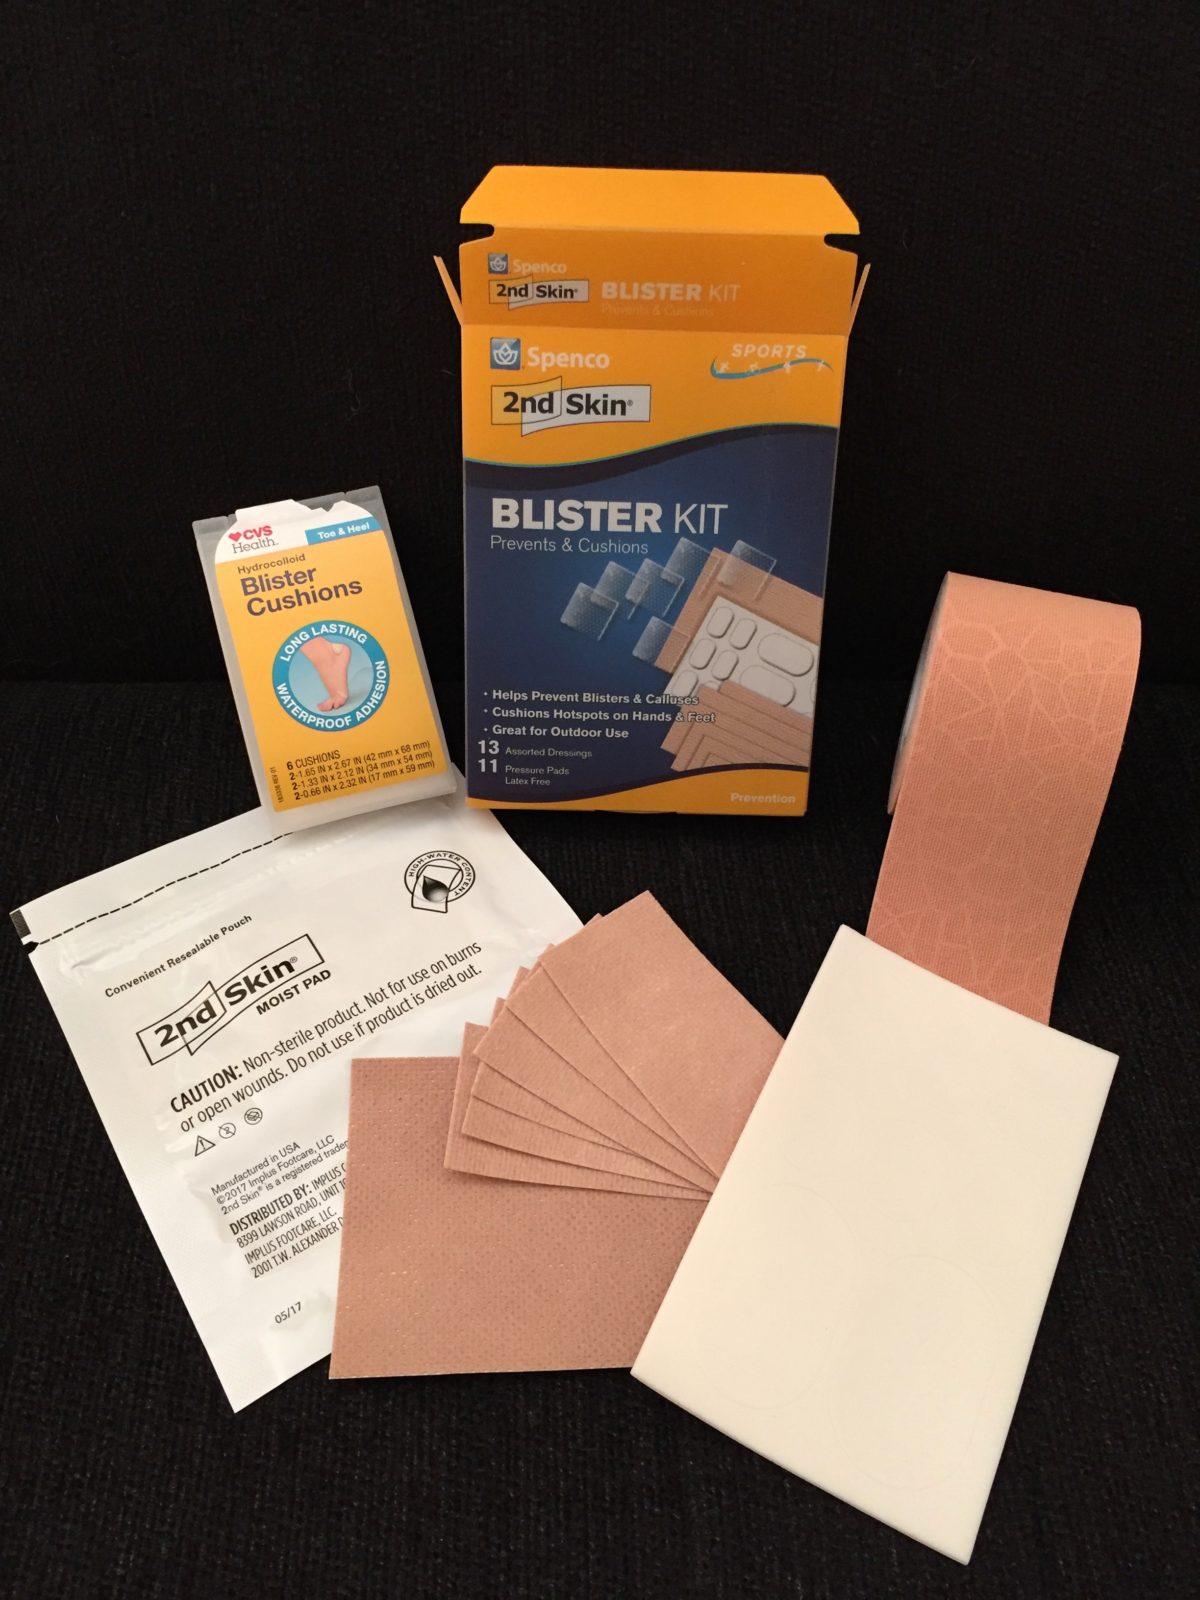
  1. Spenco Second Skin Kit

This will provide me with moleskin and gel pads to patch up any blister that pops up.


  1. Pedicure appliances

Clippers, nail file, scissors and tweezers are essential to keep my nails properly trimmed and rough and hanging skin under control.


  1. Gold Bond Powder

I’ll use this to help keep my feet dry and medicated, especially after a shower.


  1. Lotion

I’m taking a little Gold Bond tube to slather my feet with before bed, but it could be any brand of deep healing lotion. The lotion will keep the calluses down and manageable.


  1. Ibuprofen

An anti-inflammatory will help in a variety of areas, not just in case of an altitude headache. If my feet get uncomfortably swollen, an anti-inflammatory will help reduce it. It will also help if I suffer a case of hiker’s vasculitis—breakdown of blood vessels under the skin and leakage of blood into the tissues. I hadn’t incurred that problem for years, but it happened one night while hiking just prior to my departure. I have to be careful with anti-inflammatories, though. I was prescribed way too many of them when I was competing, which left my stomach damaged. They can cause internal bleeding and blood thinning, so I tread carefully when using them. Fortunately a little for me goes a long way.


  1. First Aid Kit

The little kit will provide me with some antiseptic, more ibuprofen, tape and gauze. Little emergency essentials. I can order refills for this bag.


  1. Emergency reflective blanket

This might not help for my feet, but it will come in handy if one of us gets injured and needs some warmth. Always an essential because you never know what’s going to happen.


  1. Emergency ice pack

This is the kind you squeeze to activate. It’s a chemical-based, one-type use bag. Good for injuries, swelling and reducing swelling around insect bites. It might come in handy for foot and toe hot spots too.

And, finally,

Gaiters—

These will help keep grit, pebbles and dirt out of my shoes and socks. When worn with my rain pants, they’ll also help keep water out of my shoes. While they’re not specifically made to repel rain, they will slow it down.


That’s a wrap! (No intended.)

That’s my care package. See anything you use or think you’d do well to try out?

I’ll let you know how successful I was at selecting my items when I return!


WORKOUT WEDNESDAYS will be on hiatus until October 19. I’ll give you a foot and blister care wrap-up and then head into eating and diet strategy for brain care and aging. I’ll be sharing some great information I’ll be learning at an October 9 conference.

Until then, choose your first aid kid treatment and prevention kit and supplies carefully to keep your feet in shape to keep trekking!

Blessings,

Andrea

May you prosper in all things and be in health, just as your soul prospers (3 John 2).

Photo by Andrea A Owan

Blister Care Basics: Prevention

One of an athletic trainer’s responsibilities is evaluating injuries and developing treatment plans for and overseeing an athlete’s recovery from an injury. Many people don’t know that we’re considered first responders and are often the first—and perhaps only—medical personnel on the field when an athlete suffers an injury. Through our extensive training, we can often tell what kind of injury an athlete has suffered just by witnessing the mechanism of injury—like the angle and forces involved immediately prior to the injury’s occurrence.

But another one of our responsibilities is helping the athlete stay healthy and well and avoid injuries. That’s often a difficult thing to do when you’re working with highly competitive athletes, or coaches who push their team participants beyond normal limits.


The old adage “an ounce of prevention is worth a pound of cure” is true!


Preventing blisters—

If you’ve ever had a big blister on your heal, foot or hand, you know how debilitating it can be. A big bad one can negatively affect your performance. For walkers, hikers and runners, there are some proactive steps you can take to prevent blisters, before they materialize.


 Blister prevention steps:

  1. Always make sure you’re wearing clean socks. Dirt and grit can act on your foot like a grain of sand affects the inside of an oyster. While an oyster makes a beautiful pearl, our bodies will develop hot spots and blisters. Remove your socks after every wear, shake out the grit and wash them inside out. Consider changing them in the middle of your event, especially if you’re the sweaty-feet type.
  2. If your feet tend to sweat a lot, consider wearing moisture-wicking socks. They’re thick, and sometimes feel a bit stiff on the outside, but they can help you avoid damp spots and skin maceration, like you get when you’ve been in a swimming pool or bath too long.
  3. Wear double-layered socks. This by far has been the most important piece of equipment in my hiking regimen. They reduce the friction and shear forces and add some extra padding and comfort.
  4. Wear a thin sock liner, even if you wear double-layered socks. The sock liner also helps wick moisture away from the foot to keep it dry and less prone to hot spots.

Wear comfortable shoes that are neither too tight nor too big.

  1. Use a skin/foot lubricant that reduces friction, or a powder that absorbs moisture. Lightly apply the lubricant to the areas on your feet that are prone to hot spots—like toes, balls of your feet, or heals. Know your feet and what they need. Each of my feet seems to have different needs and idiosyncrasies, so I treat them both a little differently. I tape the ball of my right foot and my ankle on my left. Two toes on each foot get taped to prevent blisters. Sometimes my left foot (on the outside) gets supportive tape since I sprained the ligaments in that area trying to adjust my foot in my old road shoes during the course of my walking. Dumb idea that has cost me hiking comfort and lots of money in tape.

Is a bigger shoe better during a multi-day event? I am not a proponent of buying bigger shoes than fit your feet at the start of a long, multi-day hike or walk in expectation that your feet will swell so much they’ll eventually fit in the shoe. A shoe that doesn’t fit you well (too small or too large) will give you major problems.

First, the anatomical shape of the shoe does not conform to or support the anatomical shape of your foot. Big problem. And your foot will be sliding forward in the shoe with each step, with your toes repeatedly smacking up against the end of the toe box. Friction, friction, friction! And toe bruising. Not good.

  1. Make sure the inside of your shoes are debris-free. Remove the insoles after every walk, run or hike, check them for grit and little stones or pebbles and shake out your shoes. Let the insoles dry out. Keep an eye on the insoles to see if they’re breaking down. You may need to replace them with over-the-counter insoles from your local pharmacy store.
  2. Consider wearing gaiters that cover your ankles and shoes. They go a long way in keeping dirt out. Both REI and OR (Outdoor Research) carry some great gaiter products. (I personally wear OR’s Surge Running Gaiters, which I purchased at REI.)
  3. If you do notice a rock has sneaked into your shoe while you’re walking, STOP, remove the shoe and shake out the offending rock. If you don’t you’ll set yourself up for either a blister or irritation developing, or a ligament sprain or muscle strain from throwing your gait off to compensate for the rock. Really.
  4. Likewise, if you notice you’re developing a hot spot, and it’s beginning to tell you you’ve got a problem, STOP, remove your shoes and socks, inspect your foot to see what’s going on, dry your foot off, (if necessary), and tape it up. Do not add more lubricant unless you’ve removed the first layer with an alcohol pad. Adding lubricant on lubricant can make the problem worse.
  5. Keep your feet clean! Make sure you’re not putting clean socks on dirty feet.
  6. If you don’t treat your feet to pedicures, make sure you know how to care for them yourself. Carry clippers, pedicure scissors and a strong nail file with you on your multi-day events.
  7. Keep yourself well hydrated with water and electrolytes. Many professionals think this can significantly reduce blister formation. (There are biological reasons that support this thinking.)
  8. BREAK IN YOUR NEW PAIR OF SHOES! Don’t buy a new pair of shoes and promptly run out and put the same mileage on them that you did on your old pair. Break them in slowly. Don’t assume your new pair—even if it’s the same brand and style—will be made exactly like the last pair. Your feet (which were used to the older pair’s laxity) will be shocked by the stiffness of the new pair. Keep your feet happy!
  9. Keep your toenails properly trimmed and cuticles cared for. Using a cuticle clipper, remove any loose, snagged skin. Using a pedicure file, file down the calluses on your heals. Go lightly with the file around your toes. (Many walkers, runners and hikers like the callus buildup around their big toes because it tends to add some protection. HOWEVER, if the callus is too thick, it can cause increased shear forces that promote blister formation beneath the callus. That’s a painful, difficult blister to care for.)
  10. Make sure you dry your feet well after showering and then lotion them up before bed. You might want to put socks on them after the lotion to aid lotion penetration.

As a gymnast, I filed down my thick calluses with an electric pedicure appliance, slathered lotion on my hands and slept with socks on them. Really. It worked wonders for keeping my hands in good condition—not too soft and not blister or rip-prone. It was common for us to get blisters beneath our calluses, blisters that filled up with blood, so caring for our hands was a must. (We also broke and drained blisters in horrible, unsterile conditions, with chalk on our hands, so we could continue to train.)


Proper training goes a long way!

  1. So many of the foot problems I see (and also encounter in myself) is improper training. One of the most problematic is improper training, or doing too many miles too quickly on poorly conditioned feet. And sore feet will alter your gait enough to cause a chain reaction of problems from your toes to your neck. So take this warning seriously!


The training rule of thumb is:

Train in an environment as close to replicating what you’ll be walking, running or hiking during the expected event. If this means wearing a backpack, train with the pack. Your feet will notice a difference.

When setting your goals, work with one variable at a time. Either increase your mileage OR (did I say OR?) increase your speed/pace, but DO NOT increase both simultaneously. And increase either of these by no more than 10% at a time. If you walk 3 miles one week and feel as though you can increase your mileage, then walk 3.3 miles the following week, at least three times a week, until you feel comfortable at that distance. Or reduce the amount of time it takes you to walk that 3 miles by 10% and do that three times a week until comfortable.

Violating this training rule is probably the biggest cause of injuries that end up being difficult to treat and end up being chronic. Better to go slowly than end up being sidelined and having to start over.


What about swollen feet?

If your feet do get swollen, there are several reasons why that may be happening.

  1. You violated the 10% training rule outlined above.
  2. You didn’t stay well hydrated or consume enough electrolytes.
  3. Your shoes don’t fit properly.
  4. You have anatomical issues with your feet (like high, rigid arches or flat feet) that make you prone to foot problems, like a dropped metatarsal head, clawed toes, or plantar fascitis.
  5. You’re wearing the wrong shoe for the activity or surface, or one that doesn’t give you the proper support you need.
  6. You walk on hard, unforgiving surfaces rather than mixing it up with more pliable ones.
  7. You have a vascular (or other medical) problem that inhibits good venous return to the heart.


Alternating shoes may help—

Something else you should consider is switching shoes during your multi-day activity. Carrying two pairs of shoes (different styles) helps in several ways:

  1. Giving your shoes a day-break allows them to air out and regain some of their resiliency and form.
  2. Putting on a different pair (and somewhat different style) of shoes the following day can help alleviate some of the stresses put on the foot from the previous shoe shape and balance. I like to switch between my more supportive road/trail combination shoes and my strictly trail shoes. The trail shoes should get me 1,000 to 1,500 miles, while the road shoes may last 350 to 500. But I’m hard on shoes, so I plan for half this number. Mixing it up helps my shoes last longer. (Be careful with this, though. Sometimes it backfires and causes more problems.)


Consider using hiking poles—

Several years ago I would have turned up my nose at the suggestion of using hiking poles, believing they were for wimps, older people who had balance problems, or for those wanting to stab some aggressive dog ambushing them during their neighborhood sojourn.

Not so any longer! I wouldn’t walk or hike anywhere now without my beloved poles. And I have two pair of different styled poles. They go a long way in taking the load off your feet (and knees) while hiking or climbing around rocks.


It’s been a long, info-packed post today. While it hasn’t been exhaustive in scope, I hope you’ve gained at least one tidbit to help you stay on your feet, keep moving and avoiding blisters and maybe some foot (or joint) injuries.


 NEXT WEEK I’ll give you my list of personal prevention and treatment items I’ll be taking with me on my pilgrimage. It was a hard decision since I’m limited in space. Come back next week and see what a sports medicine pro carries in her own multi-day hiking pack!

Until then, enjoy the outdoors—safely!

Blessings,

Andrea

May you prosper in all things and be in health, just as your soul prospers (3 John 2).

Basic Blister Care Part 3: Treating a Blister

If you’re the type of athlete that uses shoes for your sport—like tennis, running, hiking, or walking—you’re bound to end up with blisters. New shoes or too tight or loose shoes are often culprits, but there are a variety of factors that play into whether or not you’re more-or less likely to end up hobbling through your event with blisters or curtailing your workout.


I wasn’t a shoe-wearing athlete, but I had plenty of blisters on my hands from heat and shear forces generated from swinging bars day after day after day. Yes, our hands got hot just like a runner’s feet. I had to learn how to take care of them, and managing them meant attending to my hands on a daily basis.

When I became an athletic trainer, I cared for other people’s feet (and hands) and their blisters. Humbling thing, taking care of other people’s feet. And having someone take care of yours. Feet aren’t always the prettiest body parts, but they tend to bear the brunt of athletic activity.


How to Treat a Blister

Look online or in a book for guidelines on blister care, and you’re liable to find a host of suggestions. While the materials available to pad and treat blisters has changed somewhat and improved a little, the goals for blister treatment are still the same.


Goals—

  1. Decide whether or not the blister is causing pain and needs to be broken or just padded with protective padding.
  2. Always work with the goal in mind to NOT make the blister bigger, worse or allow infection to infiltrate it.
  3. Treat it in a way that promotes the fastest healing.
  4. Figure out what caused the blister in the first place and work to avoid further irritation or future blistering.


 Immediate care for the basic blister—

There was a general routine we followed when taking care of foot blisters, which often occurred on the back of the heal.

  1. We would assess whether or not we could let the fluid stay in the blister and simply use padding material and tape to create a donut hole around the blister and tape the donut hole (usually of moleskin with sticky backing or a thicker material that was built up just a little higher than the blister).

The problem with this procedure is that if you make the donut hole too large, larger then the blister, you will usually end up with a larger blister! So beware when trying this method.


 If the blister was simply too large or too painful for basic padding, then we’d do the following

  1. Using an alcohol wipe or betadine pad, we’d wipe the blister and surrounding area in order to disinfect it.
  2. Then, using a small scalpel or curved scissors, we made a tiny slice (about the size of a cotton swab) along one edge of the blister, as close to the perimeter of the blister as possible.
  3. Using a gauze pad or sterile swab, we would gently push the fluid out of the blister through the hole. If the blister was on the heal, the hole would be toward the foot. We would continue this process until the blister was emptied and just the blister “pocket” remained.
  4. Sometimes we would then soak another sterile swab with hydrogen peroxide and clean the open hole edge to kill any remaining bacteria that might sneak into the pocket.
  5. Following this, we’d smear zinc oxide onto the swab and pack the blister pocket with the zinc. The zinc has drying properties that absorb any excess fluid and keeps the new skin dry and aids healing.
  6. Then donut hole padding would be designed to fit over the lanced and drained blister and taped on so the athlete could return to activity.
  7. The process usually allowed the blister to heal quickly, the outer dead skin to dry rapidly so it could be cut off.
  8. The blister was care for with antiseptic, zinc and padding until it was completely healed.
  9. We did NOT cut the outer skin off immediately as this skin acts as a protective covering for the new skin forming underneath.
  10. Always make sure the skin is dry before treating it. We usually had the athlete come to us after they had their post-workout shower, or prior to putting on their socks and shoes for practice. If the skin around the blister was dirty, we’d clean it properly prior to treating and padding.


Alternative care—

If you don’t use a scalpel and just use a sterilized needle to poke a hole in the blister, which often occurs is a re-sealing of the outer skin and a re-filling of the fluid. Hence, another puffed up blister. If you don’t have a scalpel and want to use a needle, make sure it is properly sterilized and you poke several holes in the top and bottom of the blister and then gently drain toward one direction.

But always make sure you keep the wound (because a blister is a wound) clean, disinfected and properly covered.


Fancy padding and materials—

When Spenco’s Second Skin came along we thought we’d died and gone to athletic trainer heaven! Just cut out the desired size for the blister (we got the stuff in rolls and sheets), lay it gently over the hot spot or blister, tape it on, and leave it there for several days, even through the shower, if the taping didn’t come off.

Now any searching in your neighborhood pharmacy yields a plethora of blister care material, like Spenco, Dr. Scholl, pharmacy brand name material and others. Little donut hole pads for toes and bigger pads for heals and balls of the feet can be purchased.


Keep it clean, Clean, CLEAN!!

Whatever treatment you opt for, you must make sure you keep the blister clean. If you’re a runner, hiker, or walk, it’s easy to get dirt or grime in the wound. Make sure it’s properly bandaged and always tended to following your exercise.

And I wouldn’t recommend washing your blister with regular hand soap that’s been sitting on your bathroom basin. You would be stunned to find out how many germs congregate and thrive on that soap!


What about blood blisters?

Personally, I would always opt for draining a blood blister. They’re painful. Blood is an irritant, and just draining the blister of that pressure and irritation goes a long way toward regaining some comfort.

But you always need to be on the lookout for an infection with this type of blister, so pay extra careful attention to its healing. Look for signs of pus, discolored fluid, redness and heat around the wound.

What about for blisters that really don’t need to be drained?

For smaller, or tiny blisters that don’t need to be drained, it wasn’t uncommon for us to just tape them down with adhesive tape, directly over the blister. This obviously pulls the skin off when you pull the tape off, but I often us kinesiotape directly over my small toe blisters. The tape stays on several days through showers and moisture and provides a protective, sticky coating.

And keeping it clean is one of the reasons I don’t like plain old Band-Aids. They don’t seal well around the blister and allow dirt and grime to enter the area. And because they don’t seal, they can end up rubbing on the blister, which further irritates it.


One product I love is medical-grade Manuka honey pads. They also provide a great covering that stays on in moisture, protects the wound with padding and promotes healing. But be careful. If you’re allergic to bees or any bee product, you shouldn’t use them.


What about blood blisters under toenails?

Blisters under toenails are especially painful. They need to be drilled and drained. A special tool (or VERY clean nail) is required for this, so don’t head out to your tool chest to get just any old sharp implement.


But what about how to avoid getting these pesky irritants in the first place?

That’s what we’re going to cover NEXT WEEK—steps you can take to avoid having to deal with blisters, so many of them, or such severe ones.

Until then, make sure you have a blister care kit available at home, and whenever you go out walking, hiking or running. You never know when you’re going to have to get off the trail, peel off those socks and shoes and treat a hot spot. If you don’t do it then, prepare to suffer longer than you should have!


Blessings,

Andrea

May you prosper in all things and be in health, just as your soul prospers (3 John 2).

 Photo by Andrea A Owan